


Sunday 28th April - Website Designing and Warrior 2 Aligning
I've been away from the blog for a few weeks (sorry about that), but I've not been sitting around with my feet up - I've been redesigning and upgrading the Thrive Yoga website. You'll notice the new look to the blog and, if you go for a click through the site, you'll see there are a few other changes too. There's a now Search tab which will allow you to find anything I've ever put up on the site. Want to make that recipe that you tried months ago? You can now search for it. Want to do a class specifically for, say, stretching your legs? Enter the keywords into the box and it will bring up any that are relevant. I hope you'll find this a really useful addition. There's also a new 'Yoga In-Person' page where all my classes are listed, and lovely new photos taken by my daughter Rachel (she's known on Instagram as @r.ejs if you want to take a look at more of her work). There are enhancements for members of Thrive Yoga's Online Classes too - a Favourites button so you can save classes that you like and want to return to, and quick links to the latest class, blog post, Class Finder tool and Facebook page. I hope you like it all and find it easy to navigate around. I'm feeling rather proud of it and am wanting to share it with the world so if you know someone who could benefit from a bit of yoga in their life (and frankly who couldn't? - and there's a style of yoga to suit everybody) then please would you share the website link with them so they can take a look too. Thank you, and for being a part of Thrive Yoga - I couldn't do it without you :-)
This Week's Class Notes... Aligning Your Posture in Warrior 2 Pose
In some of my classes this week we did a lot of Warrior 2 Pose. If I count through the different sequences and double it, because we do each sequence on the right and left sides, we must have done it 8 times! Also known as Virabhadrasana II, it's a pose with many benefits and, as it's accessible to all levels of yoga practitioner from complete beginner onwards, it's not surprising that it features regularly in many yoga classes. Its benefits include: strengthening the feet, ankles and legs, stretching and opening the hips, groins, abdominal area and chest, strengthening the arms, developing steadiness and concentration, improving circulation and stamina, and encouraging full and deep breathing. And it feels nice and expansive and energising too.
Once you settle into Warrior 2 Pose there's time to do some self-adjusting. Here's a checklist for you to run through next time you practise it - and if you have a big enough mirror (or even patio doors will do in the right light) you can check your reflection (with interest not criticism) and see rather than feel your alignment.
I recommend starting from the ground and working upwards - stability starts with your foundation and in this case that's your feet. It also helps you remember the adjustments if you always do them sequentially like this.
- Lift up all 10 toes - this will ground your heels and the balls of your feet and encourage your arches to lift, which firms your inner legs. Then lower your toes back down, spreading them out as wide as possible. Notice the connection of your feet with the ground.
- Check that your bent knee is aligned directly over your ankle. Make sure that it doesn't drop inwards (which it nearly always wants to do!) and that it isn't too far forward of your knee (which can create instability for the knee joint and the pose itself). If your knee is behind your ankle then invite yourself to go a little deeper into the lunge - you might surprise yourself and find that you have a little extra room to do so.
- Press the outer edge of the back foot into the mat and lift the arch - this will stop the ankle collapsing inwards towards the floor and help to strengthen and straighten that back leg.
- Draw your abdomen in and have a sense of lifting it up - this will stop you over-arching your low back.
- Draw your lower ribs in - they often flare outwards and this makes your lower back over-arch too.
- Soften your shoulders down away from your ears and extend out through the arms with energy, right the way through to your fingers (no floppy hands here!). Check that both arms are at the same height - the back hand has a tendency to get forgotten about and is often lower and less energised than the front.
- Extend your spine from your tailbone up to the crown of your head - think long, light and lifting!
- And finally turn your head to look down your front arm to your fingertips.
You are now steady, stable, strong, focused, poised and energised - you're just like a warrior. You're ready to deal with whatever comes your way and you're in the best alignment for optimum health and wellbeing too.
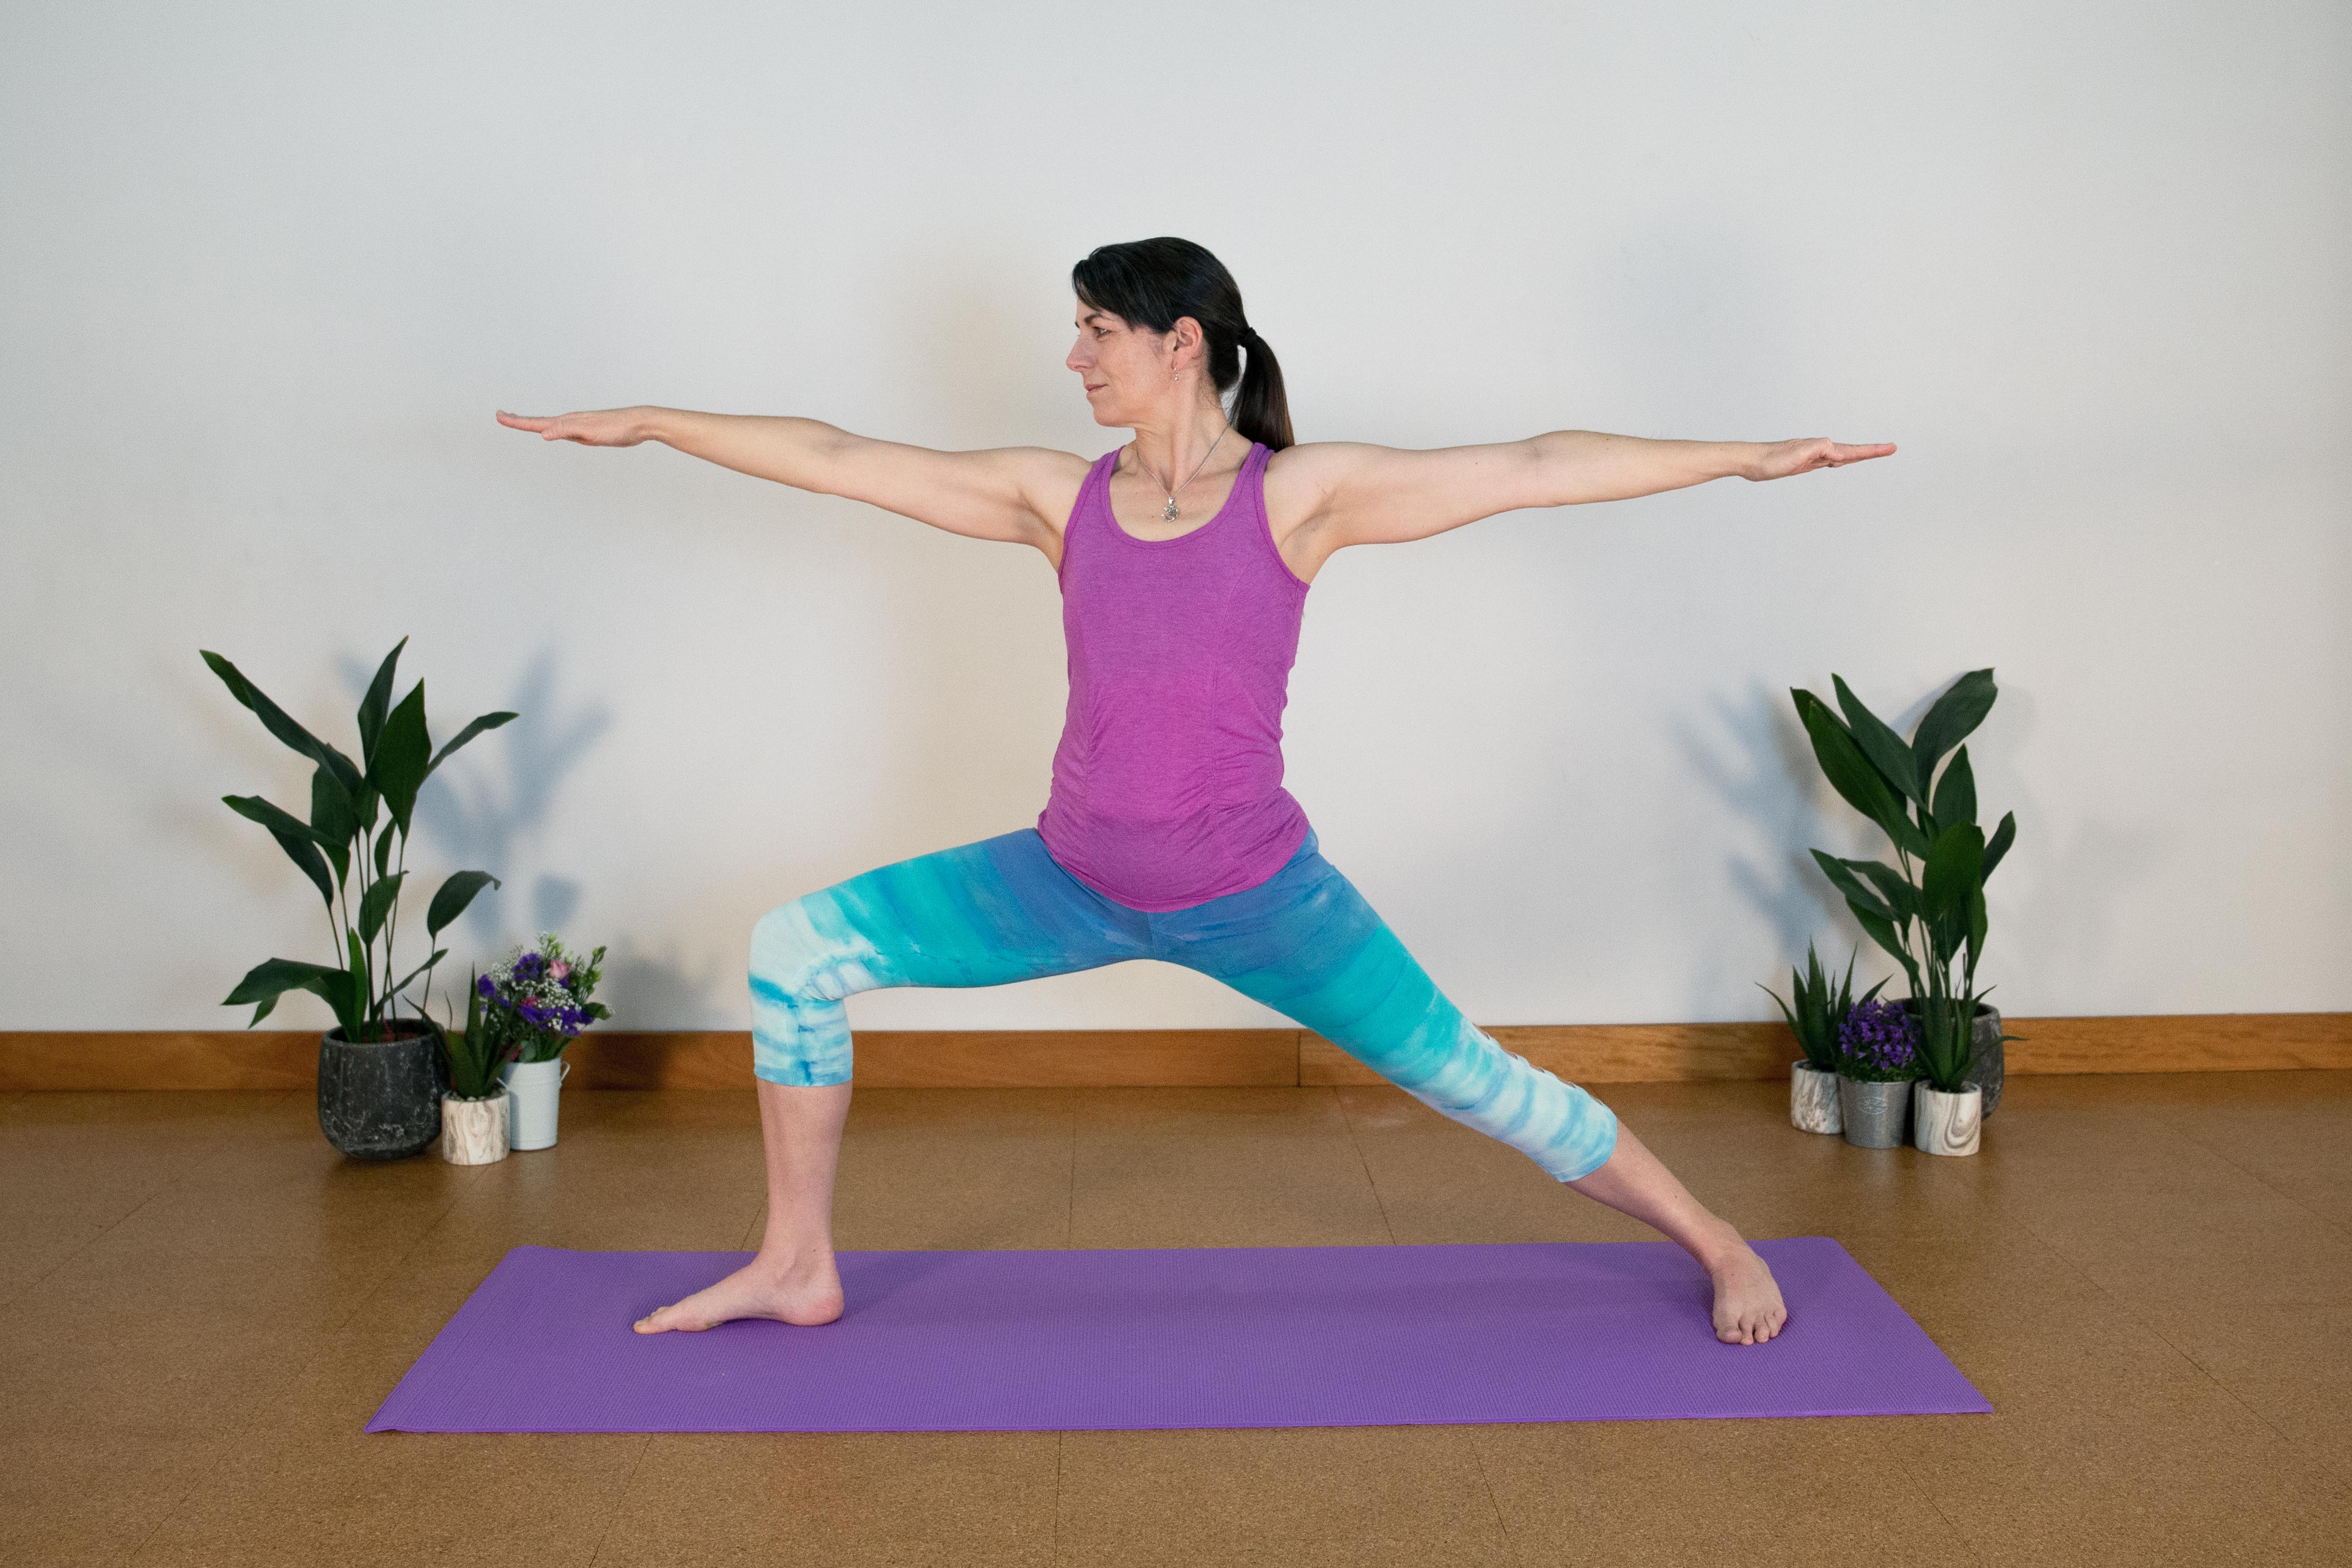
Alignment points for me to note (being curious, not critical): I could straighten my back leg a little more,
I could draw my belly in more. My spine is a little behind the vertical and my arms could be a touch lower, so that they are in line with my shoulders.
Other than that, I look strong and energised and I'm rocking that Warrior 2!
This Week's Recipe... Celeriac Soup
I never really know what to do with a celeriac. I mash it with ordinary potatoes sometimes to add a bit of different flavour but apart from that I hardly ever use it. I haven't come across many recipes for it either so when I found this one on the River Cottage website I thought I'd give it a try. I'm glad I did - it was simple to make and very tasty, with a subtle celery and aniseed-y flavour.
You will need:
butter or olive oil for frying
1 medium-sized celeriac, peeled and cubed
1 medium-sized potato, peeled and cubed
1 leek, trimmed, washed and sliced
1 onion, peeled and chopped
1 garlic clove, crushed
1 litre of vegetable stock (use Marigold Vegetable Bouillon for the best taste)
And here's how to make it:
Heat the butter or oil in a large saucepan over a low heat. Add the celeriac, potato, leek, onion, and garlic and gently sweat the vegetables for about 10 minutes until they start to soften.
Add the stock, bring to the boil and then simmer for about 20 minutes until the celeriac and potato are completely tender.
Allow the soup to cool a little before you whizz it in a blender until it's smooth.
Season to taste as required and reheat.
Serve with a swirl of pesto or greek yoghurt if you like.

This Week's Mother Nature's Magic... Propagating Pothos Plants Part 2
If you cut some pieces of your pothos plant to make new ones when I wrote about it on the blog last month, they'll have lots of lovely roots now and be ready to pot out if you haven't done so already. You can take a look at Part 1 HERE where I show you how to take the cuttings from the original plant. If you haven't got a pothos plant (also known as devil's ivy or scindapsus) of your own but know someone who has, you could ask them for a piece - they can get a bit straggly and benefit from a prune every now and then.
So here's what to do when you have got some lovely roots growing from your leaf cuttings:
Find a plastic plant pot in your shed (if you need one let me know - I have hundreds!). It needs to be about 10-12cms in diameter or whatever will fit inside your favourite ceramic indoor plant pot so you can fit 4-5 cuttings in, with room for them to grow.
If the roots are just a few centimetres long as in the photo below fill your plastic pot up almost to the top with multipurpose compost (leave a couple of centimetres to allow for watering), pat it down firmly and level it off. Push your finger deep into the compost near the edge of the pot and very carefully lower the roots of a cutting into the hole. The bit of stem that you cut from the mother plant is on, or just below, the surface of the compost and the leaf is obviously above it. Press the compost back around the stem to keep it in place. Repeat this around the edge of the pot until you have planted all your cuttings, then give it a good water.
If your roots are already too long for this then put about 3-4cms of compost into the pot first then carefully lie the roots of the cuttings on top of this, positioning the leaves evenly around the edge of the pot, then fill up the pot with more compost until the roots are below compost level and the leaf above it. Gently firm the compost around your cutting to keep it steady and give it a water.
Put the plastic pot inside your ceramic one and place it somewhere bright, but not in direct sunlight (too much direct sun will scorch the leaves and if you put them in a dark corner they will lose the varigation of their leaves). Water once a week and they will soon be off and growing at a vigorous rate.
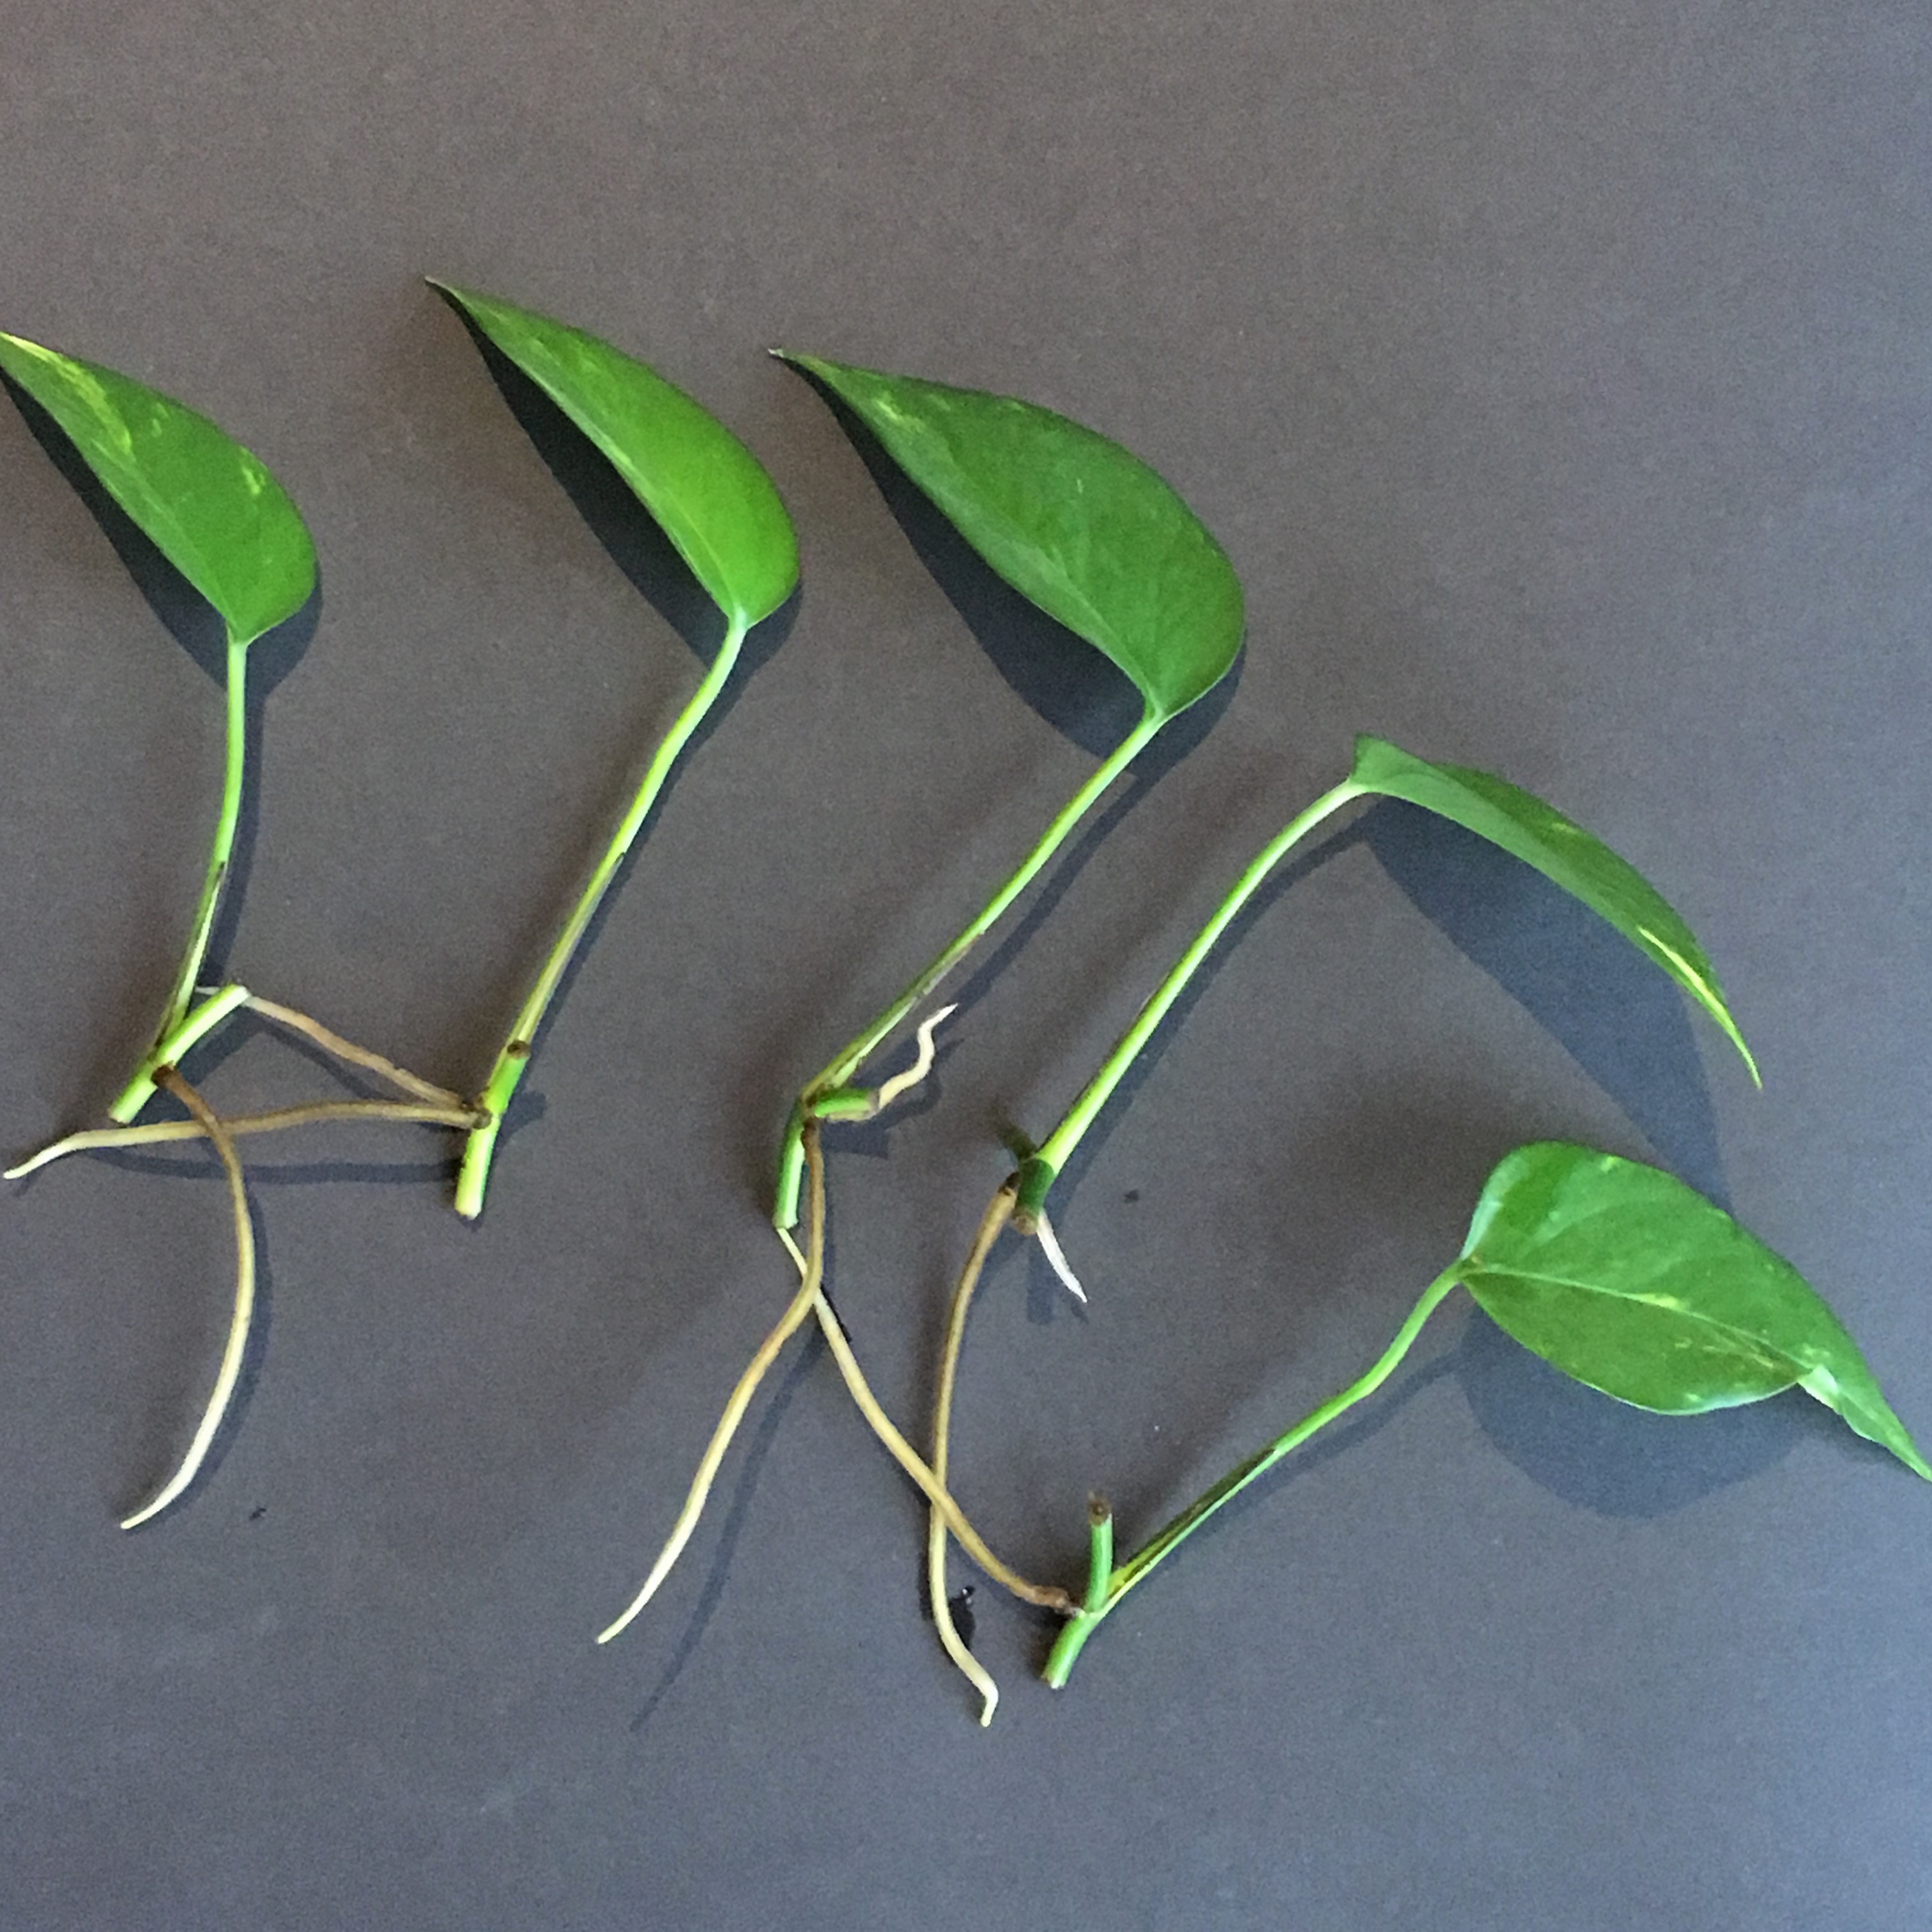
Cuttings with roots!
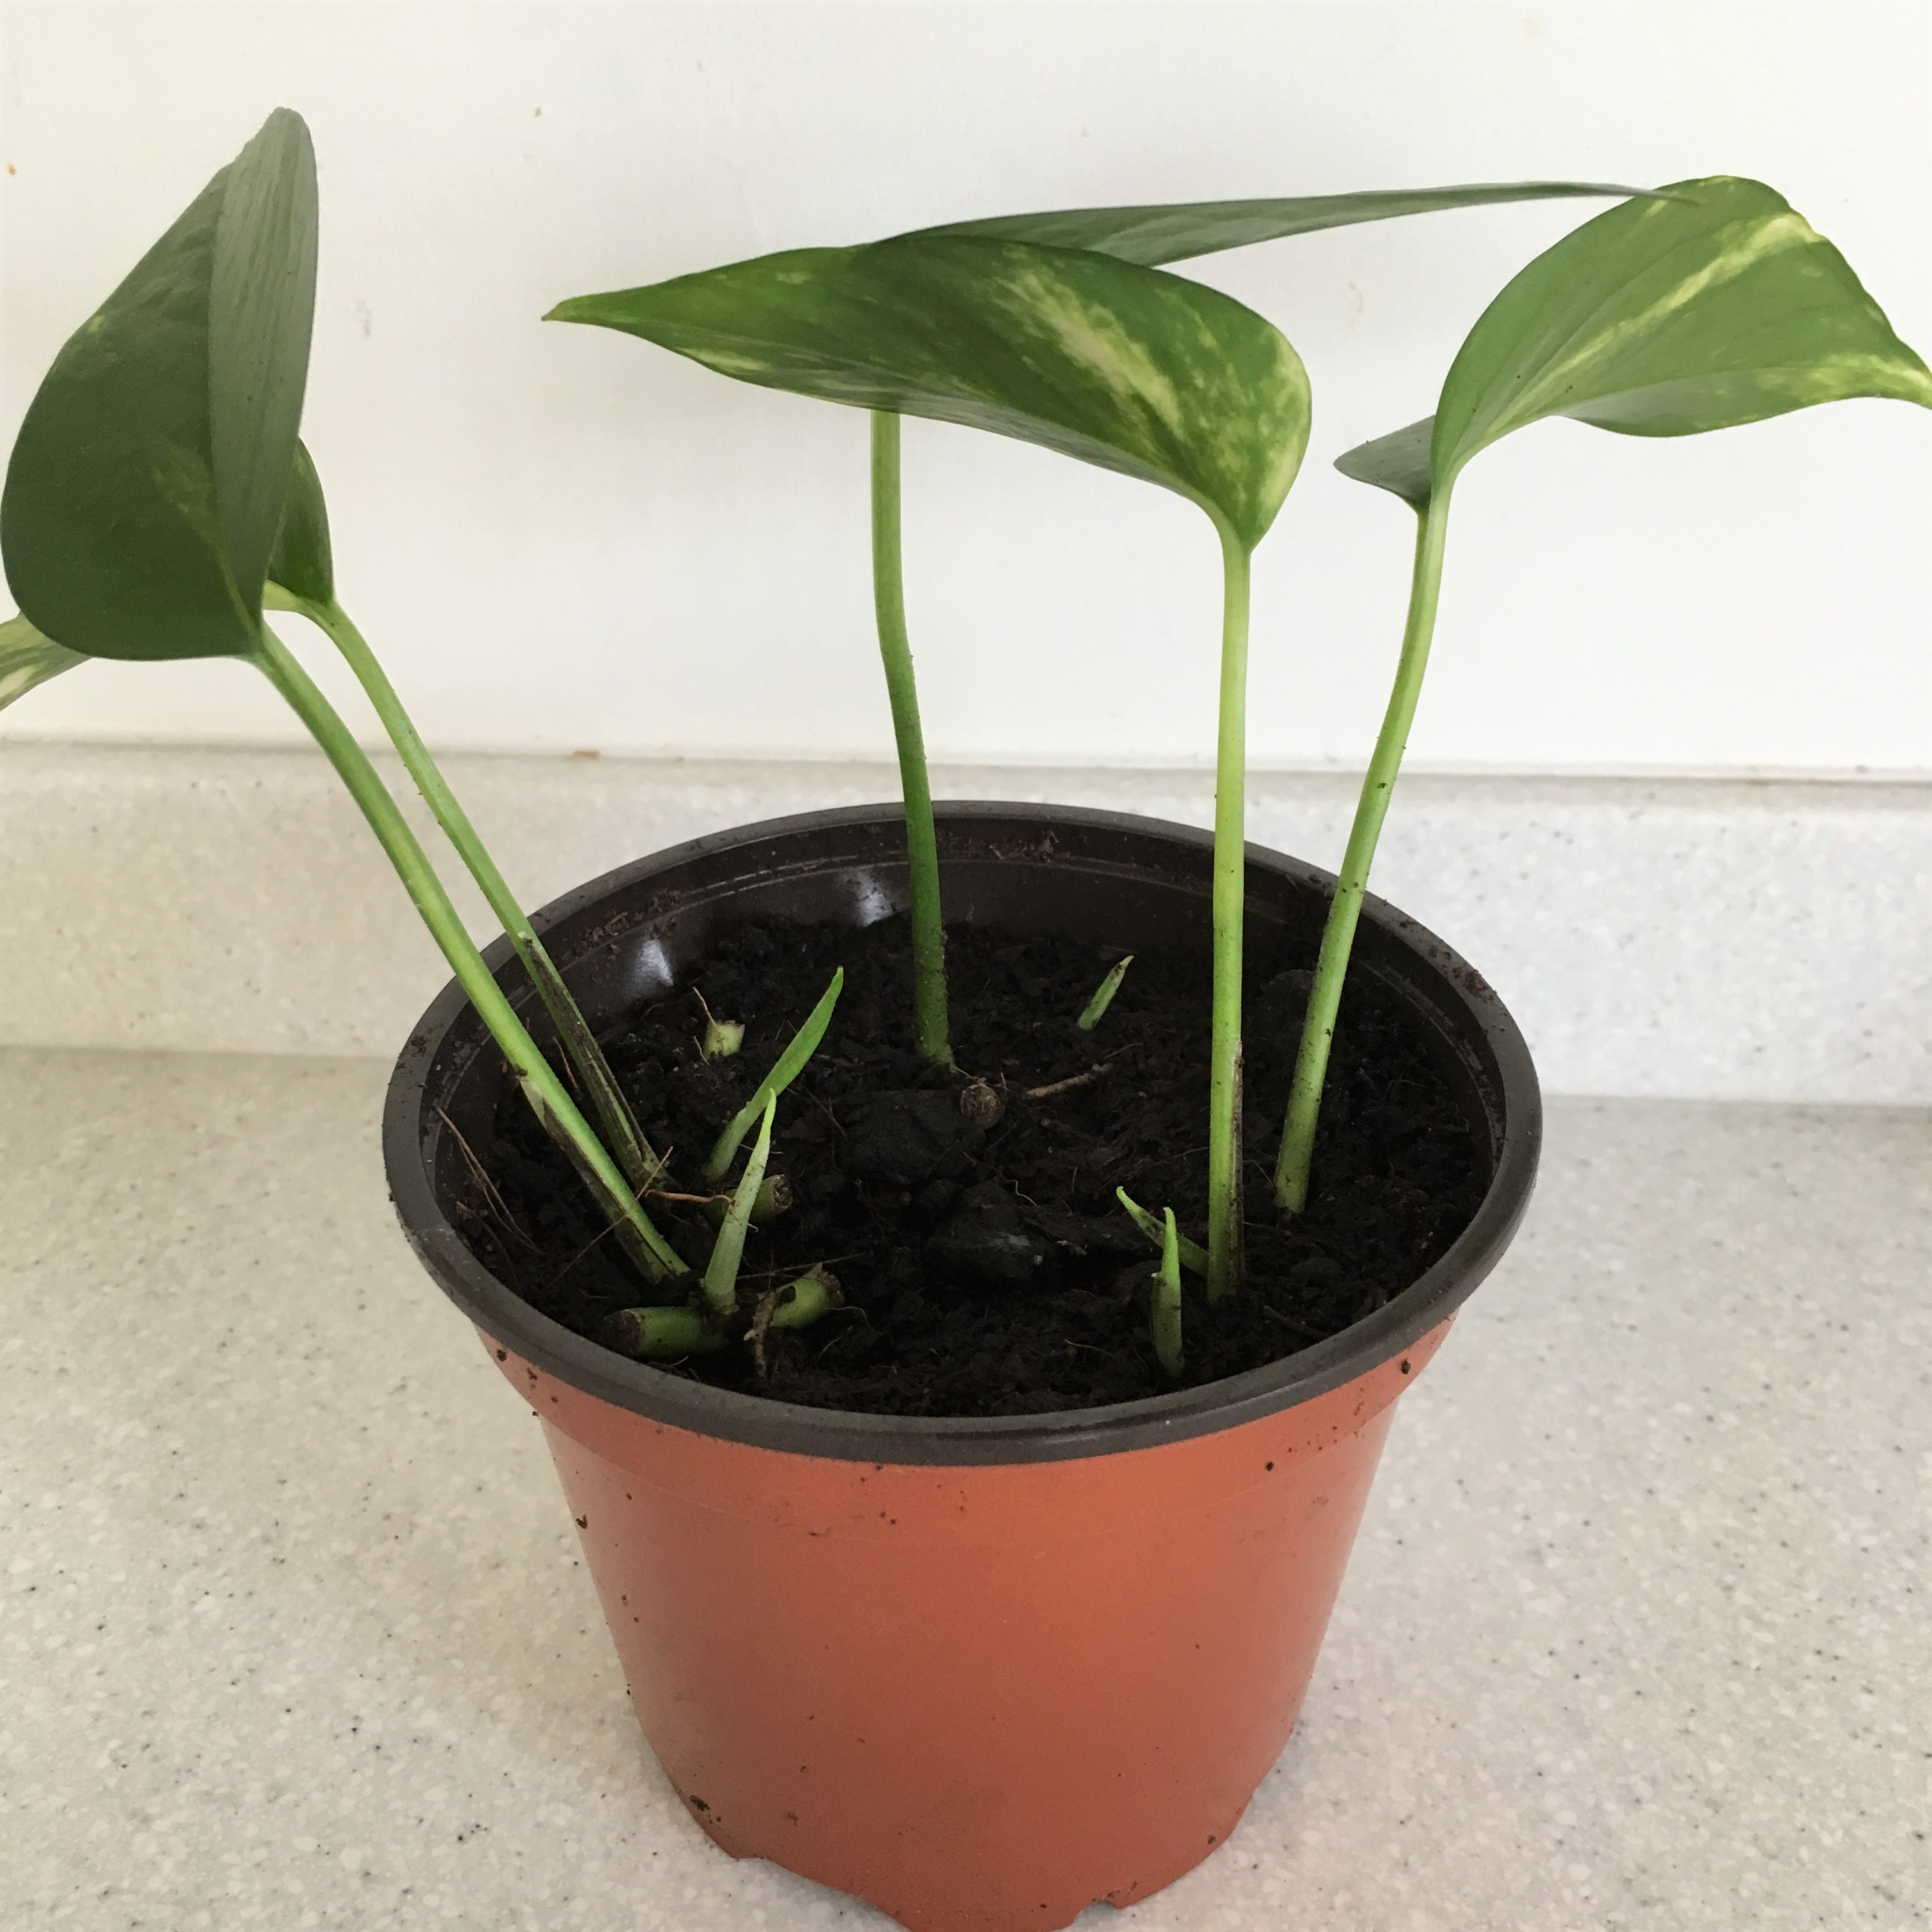
2 weeks later - can you see the new shoots coming?
And here's a little extra magic from my garden - beautiful Tulip 'Milkshake'...
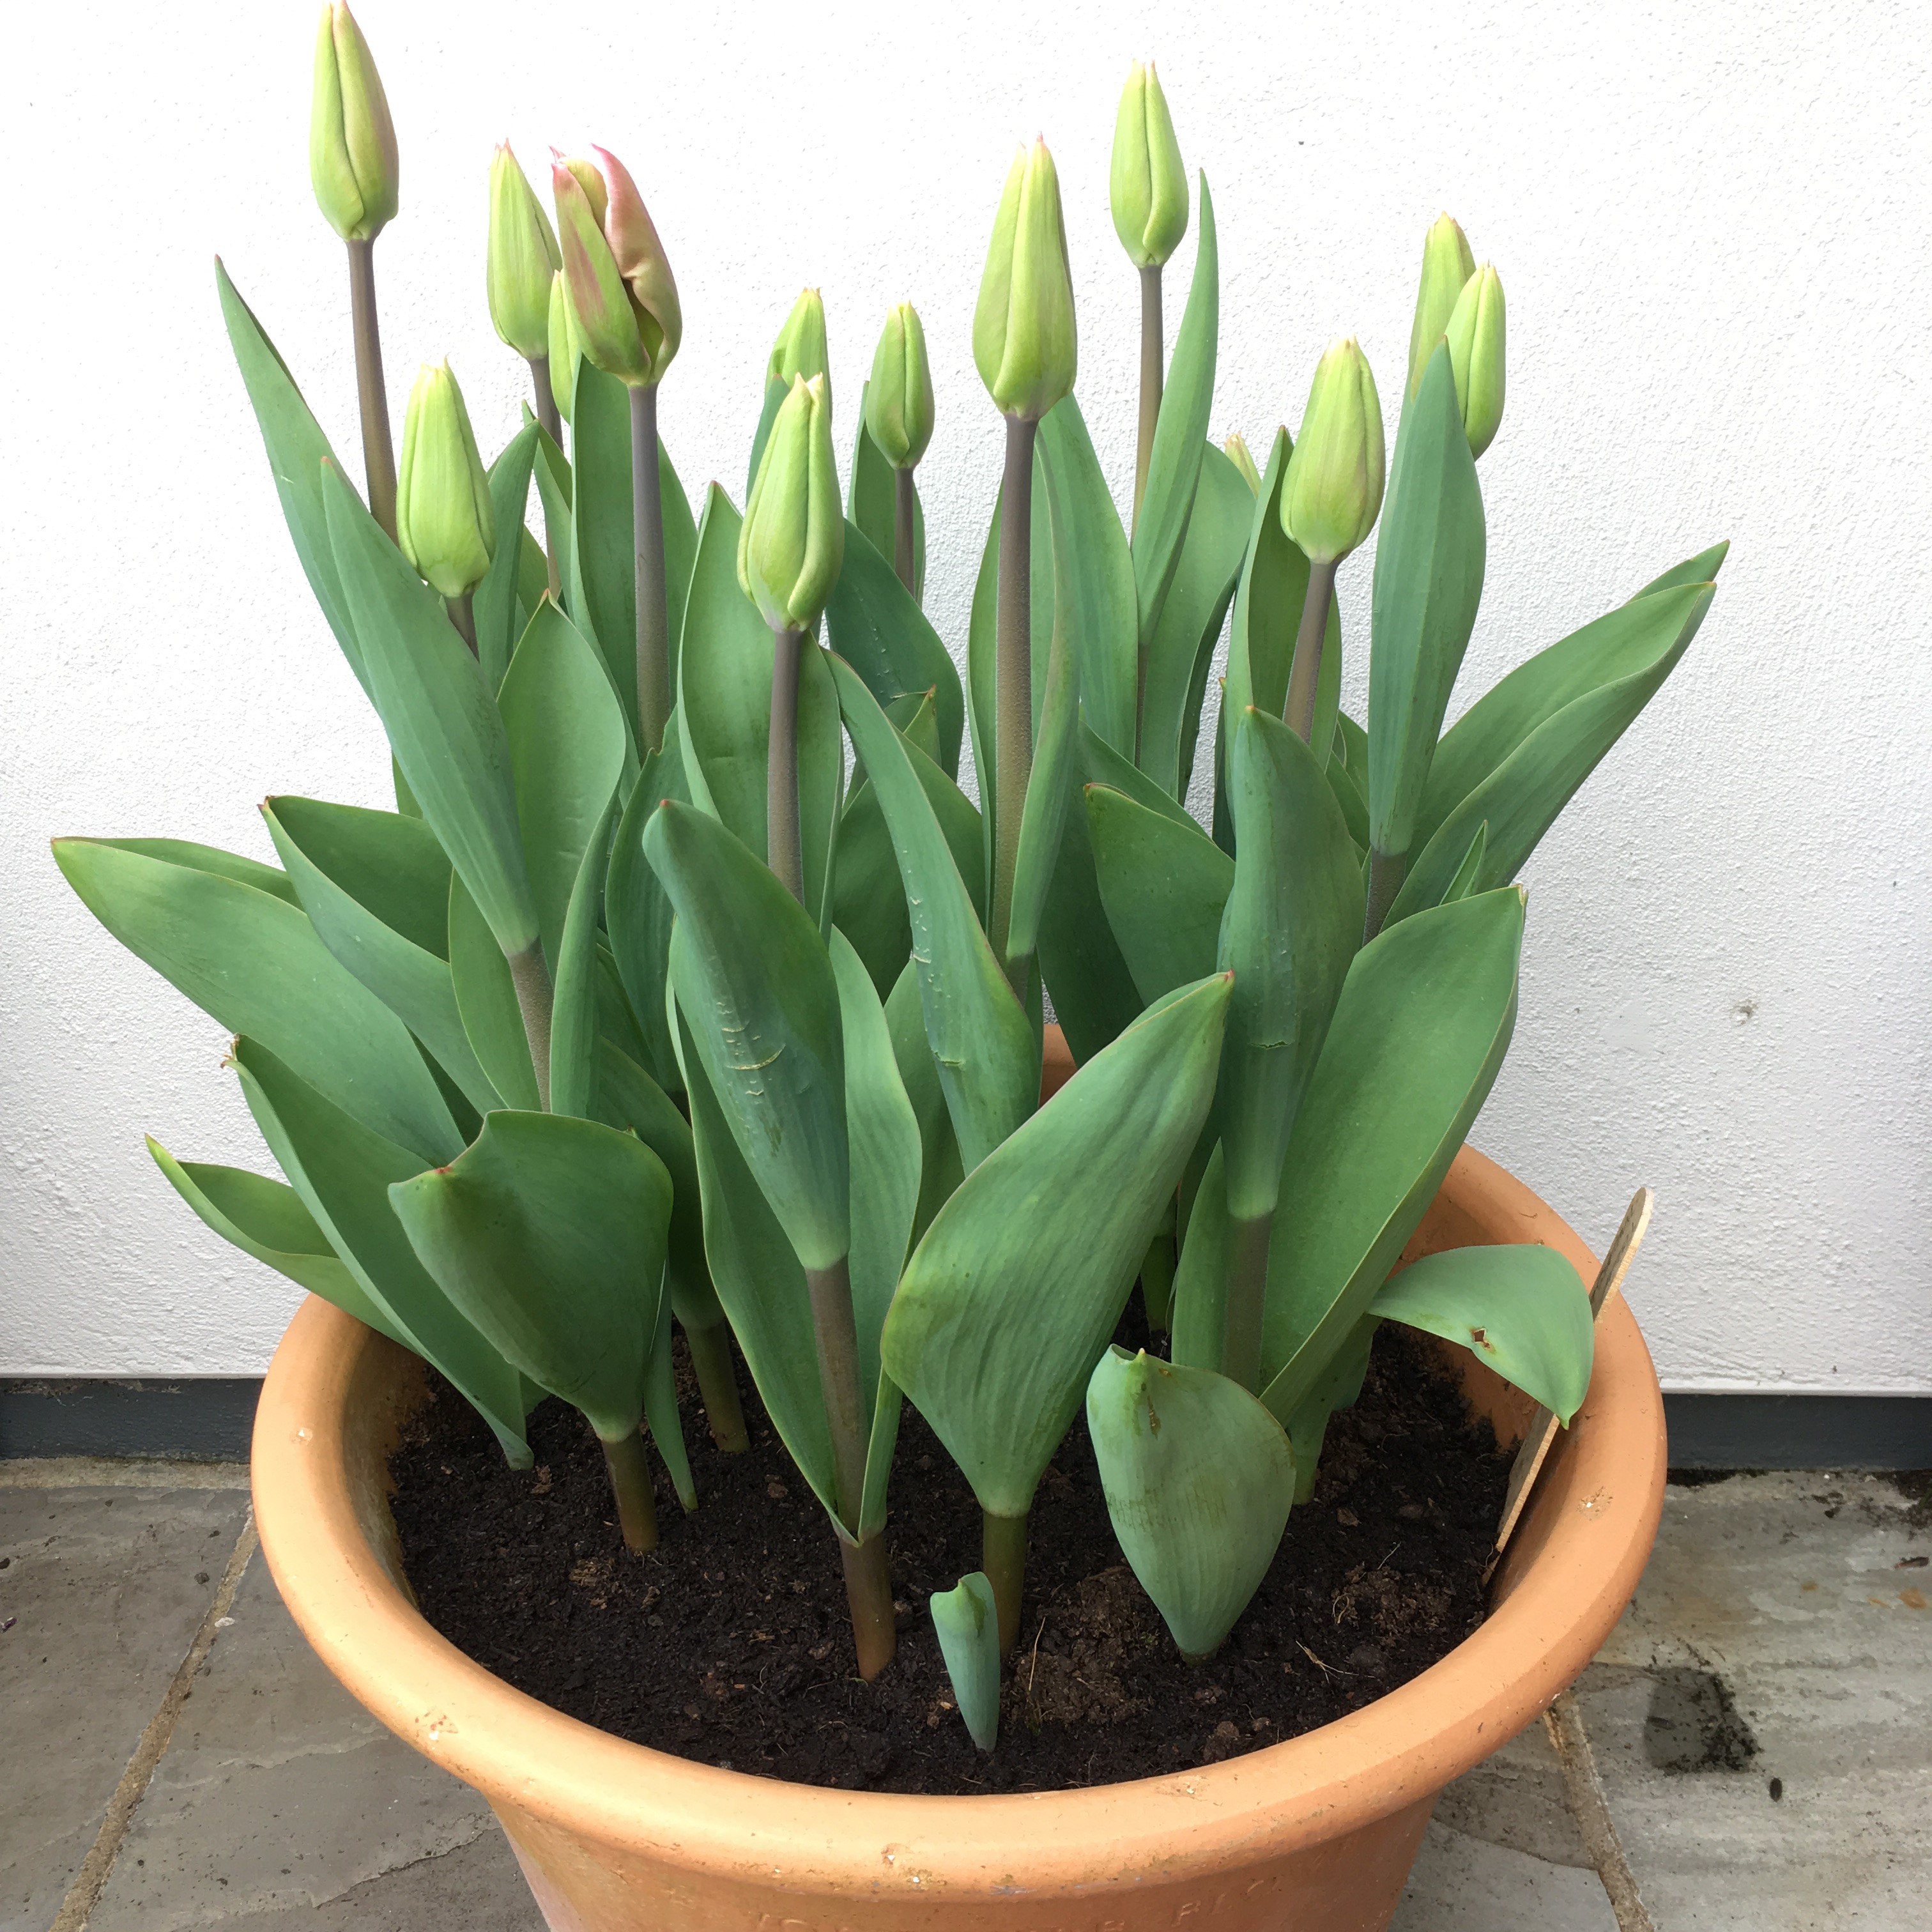
Wednesday...

...Sunday!

This Week's Musical Offering... Cloudy Sunrays by DJ Taz Rashid - a good strong and steady rhythm for your Sun Salutations
This Week's Video... the inspiring new Nike advert... What's stopping you doing what you want to do? It doesn't have to be something sporty or athletic, it could be something much more 'ordinary' but whatever it is, don't let anyone else tell you that you can't do it!