Monday 13th March - Bollywood, Beetroot and a bit more about Bow Pose
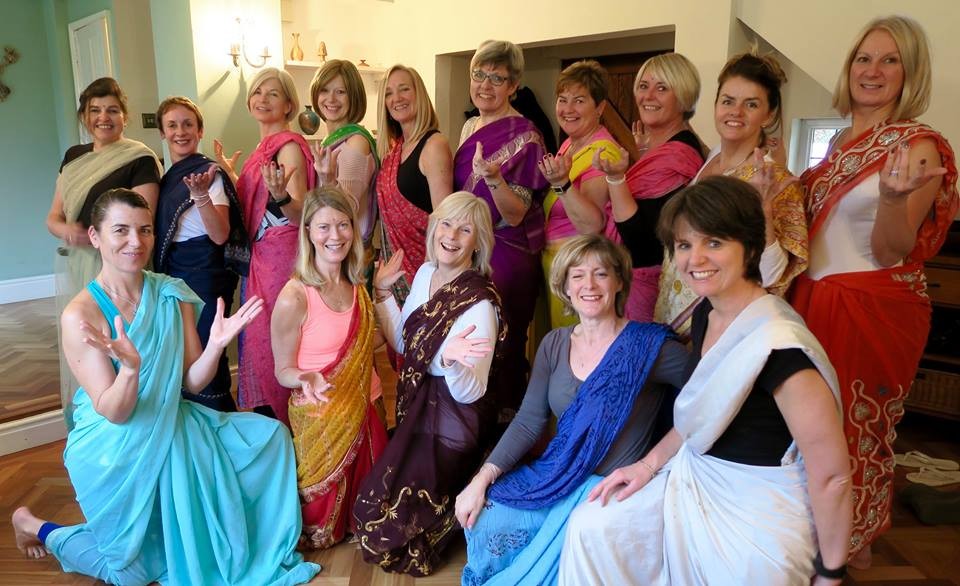
52@50 no 23: Bollywood Dancing
This was fun. On a girls' weekend to celebrate a friend's birthday we had a Bollywood Dance lesson. The teacher bought saris, we stuck on bindhis (the pretty little stick on jewels that Indian women wear on their foreheads), and we learned some fabulous, funky moves. We learned about 4, put them together into a short sequence, then learned 4 more. And so on. Until finally we put them all together and did a whole routine. We were really very good and we really enjoyed ourselves. And I would definitely do this again.
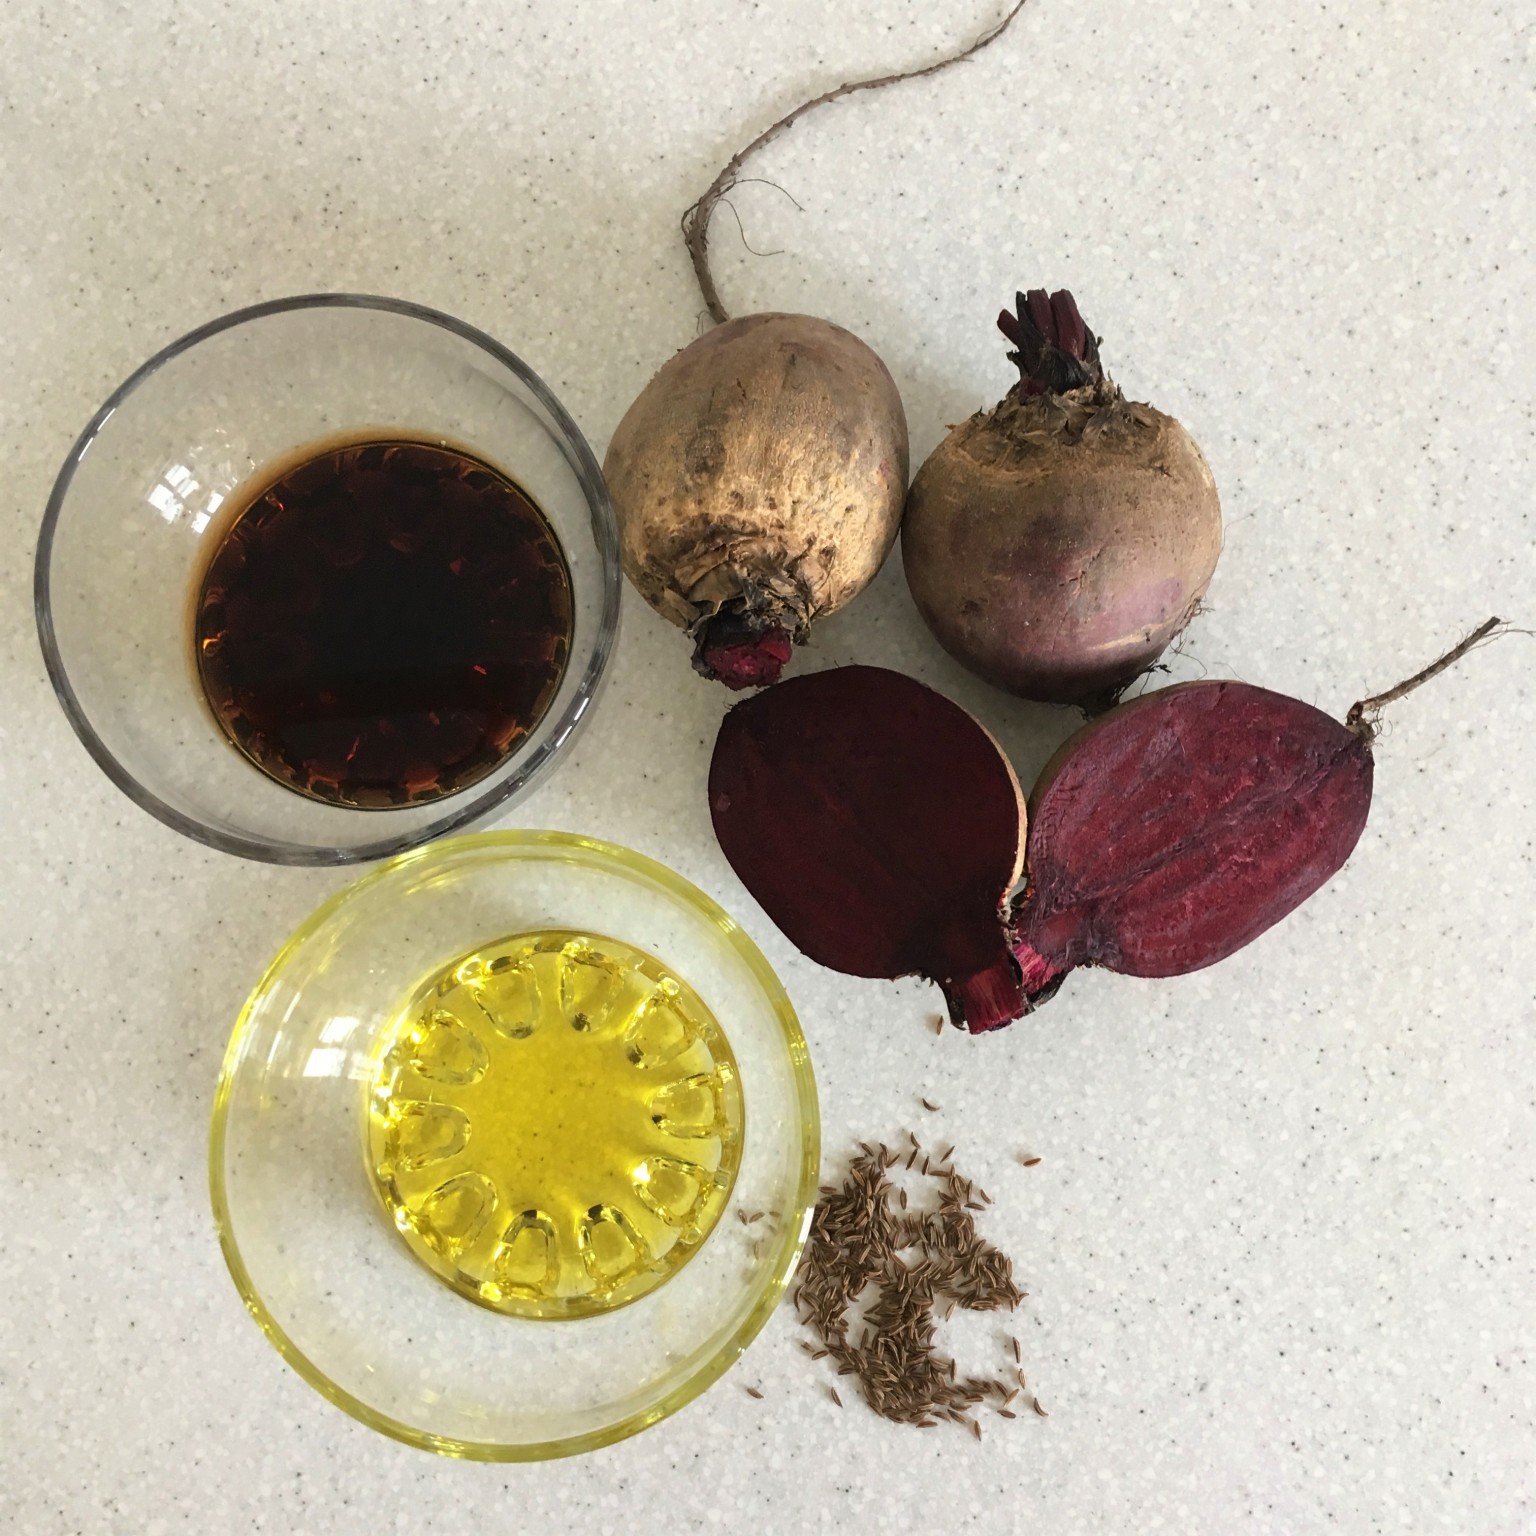
This Week's Recipe... Roasted Beetroot with Balsamic Vinegar
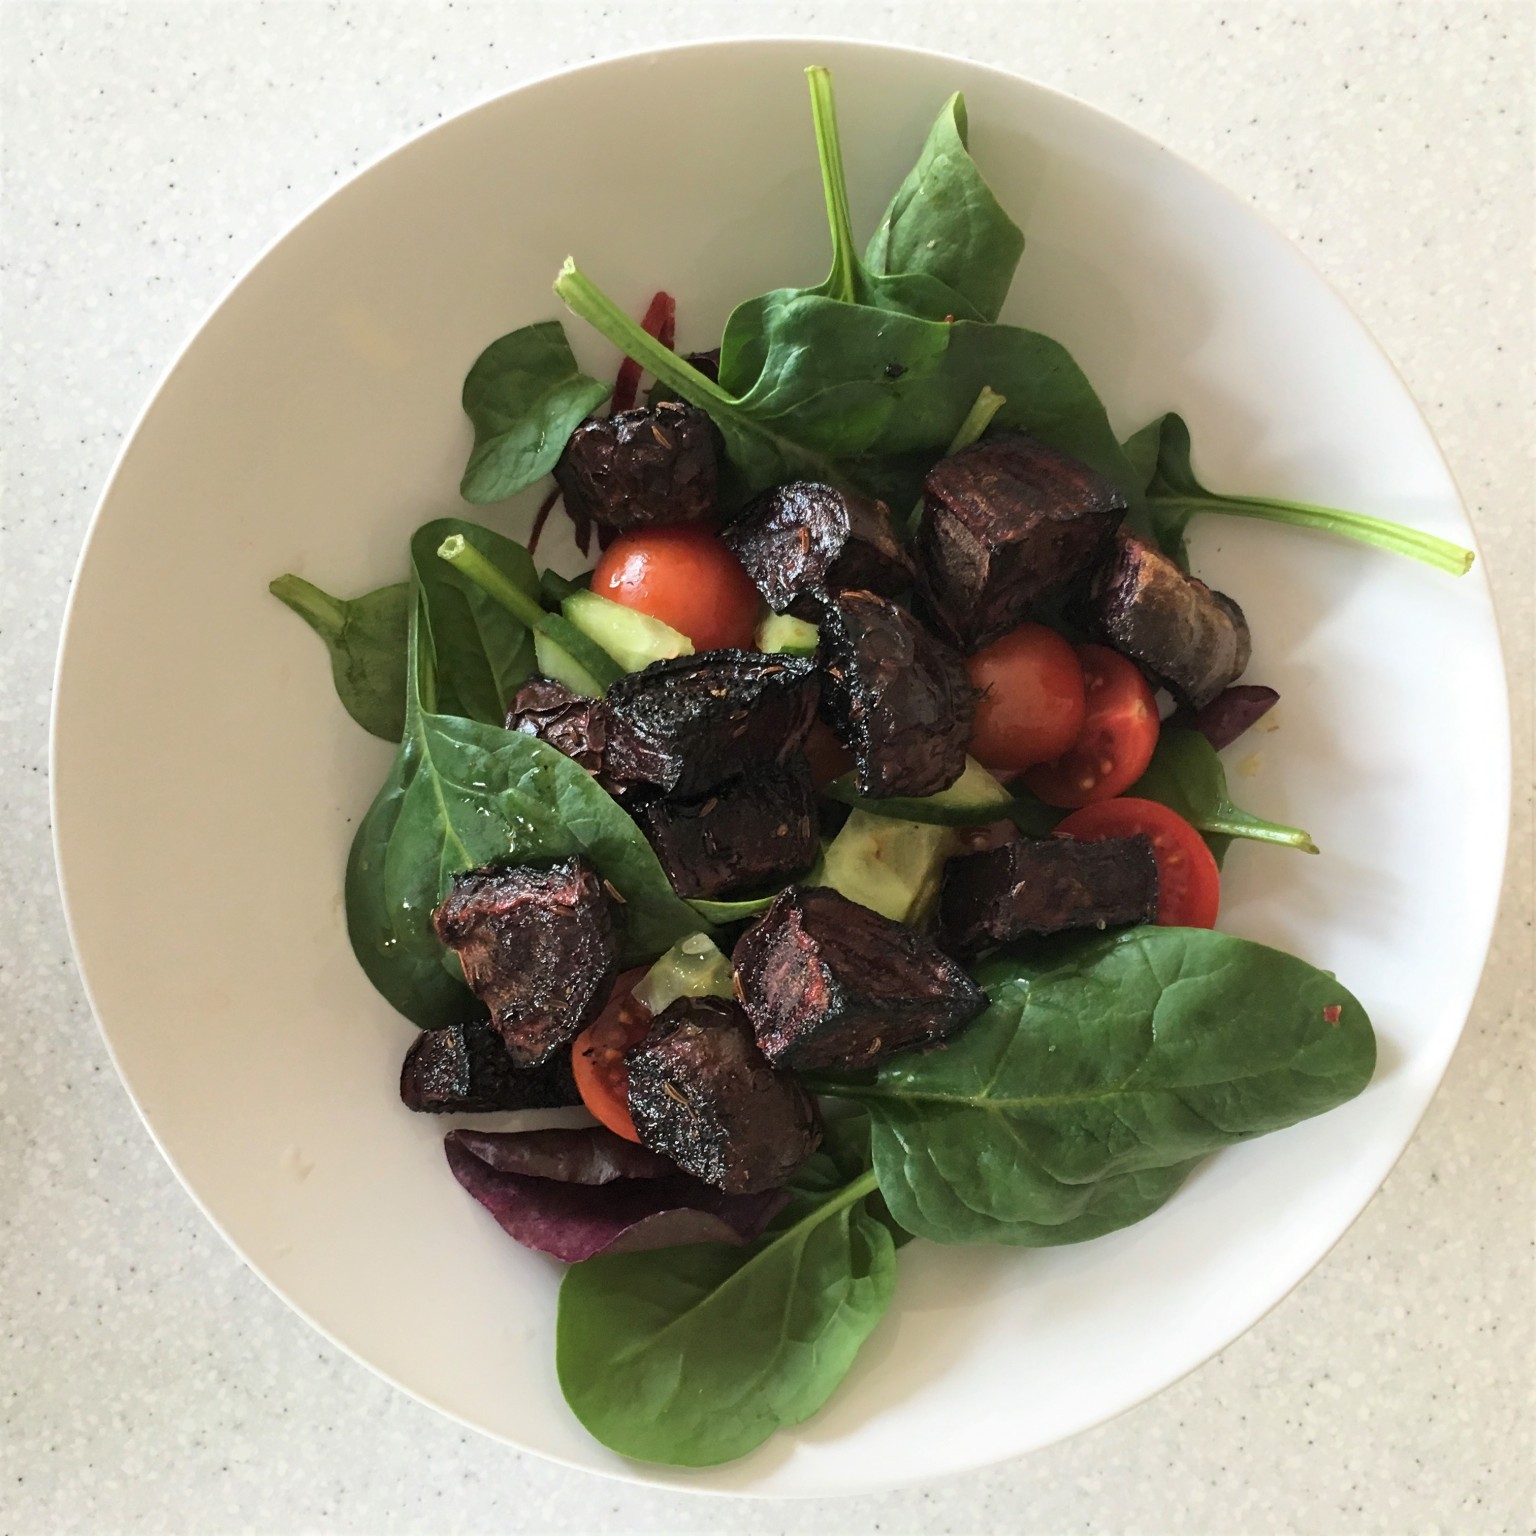
This recipe is another one from Florence House, the venue that I use for my weekend yoga retreats. I eat raw beetroot fairly often in salads, and I had 3 left over from the Rainbow Salad that I did for last week's blog so I thought I'd give this a go. Roasting it really brings out its sweetness and the balsamic vinegar makes it caramelise and go a bit gooey at the edges. I served it with a salad and it was delicious.
You will need:
1 large beetroot per person
Olive oil
Balsamic vinegar
1 teaspoon of caraway seeds or fennel seeds
And here's how to make it:
Preheat the oven to gas mark 6, 200C.
Wash and top and tail the beetroot. No need to peel - life's too short!
Chop the beetroot into 2.5cm chunks, then place in a deep roasting tray, toss liberally with the oil and balsamic vinegar and seeds if you are using them.
Bake in the oven, tossing regularly for about 45 minutes to 1 hour. At first a lot of juice will come out of the beetroot but don't panic - this will all evaporate.
When done it should be nicely caramelised around the edges but still have a slight bite in the middle. Serve hot or cold.
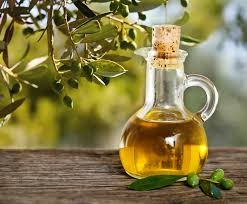
I usually use olive oil in my cooking as I like the flavour but, after reading this article from the Times on Saturday I might start experimenting a bit more.
A Bit About Which Oil to Use in Your Cooking
Supermarket shelves are full of trendy oils like rapeseed, hemp and argan - but what do you actually do with them. Peta Bee from the Times on Saturday explains.
There was a time when it felt exotic to slug olive oil into your pan instead of sunflower oil. No longer. These days supermarket shelves are jammed with a dizzying variety of oils from argan and coconut to groundnut and hemp. Many of us throw these 'new oils' into our shopping baskets in an attempt to be healthier, but then have no idea how best to use them. Should some be kept just for salad dressings? Are some more beneficial than others? And what is the importance of an oil's smoke point?
Martin Grootveld, a professor at De Montford University in Leicester, researches the effect of heat on a range of oils. He explains that a smoke point is the heat an oil can be taken to until it starts to break down. When this happens free radical chemicals and toxins including aldehydes are released, which have been linked to cancer and heart disease. Thus oils with higher smoke points are generally considered better for frying or roasting. His rule of thumb is that it is better to cook with more highly processed oils and save virgin, refined and cold-pressed oils for salad dressings or to drizzle over your meal. 'The more highly processed an oil, the higher the smoke point it has, meaning it is safer to cook with,' he says.
Which olive oil should you use? There are two main types of olive oil - extra virgin and regular. Extra virgin is the purest form and is packed with antioxidants. Some is produced in a centrifuge, but the best comes cold-pressed. This is the most expensive and is best for drizzling or for dipping with bread. Regular olive oil is more processed and has a higher smoke point, so is better for cooking. That said, a study found that frying vegetables in extra virgin increases their antioxidant capacity and produces chemicals that help to prevent cancer, diabetes and loss of eyesight.
Here's our guide to the new oils and how to use them:
Rapeseed Oil Produced from seeds of the bright yellow flower, this is the vegetable oil with the fastest-growing sales in the UK. It is rich in omega 3,6 and 9, forms of fat that the body needs to maintain good skin and brain health, and has more vitamin E than olive oil. 'It's a good source of monounsaturated fats and omega-3 ones,' says Azmina Govindji of the British Dietetic Association. As its flavour is light and neutral, it works as a replacement for butter in baking, and is good to use when roasting. It also has a higher smoke point than many oils. Jamie Oliver is a fan of its delicate nutty taste and so is Hugh Fearnley-Whittingstall. In his River Cottage Light and Easy cookbook he says that 'its golden colour, sweet, grassy flavour and high burn point mean it's exceptionally good for both trickling and cooking'. Best for: frying, roasting baking (smoke point 205-230c)
Hemp Oil Pressed from hemp seeds, this oil is rich in fatty acids similar to those found in fish oils, such as omega-3 alpha-linolenic acid, which has been linked in studies to positive effects on the heart and blood vessels. It has a strong taste, almost like a nut oil, and a low smoke point, so it's best not to heat it. It contains vitamins A and D, and has been found to boost levels of GLS (gamma-linolenic acid), a substance with a potent anti-inflammatory effect that may help with skin conditions such as eczema. Best for: dips and dressings (smoke point is 150-165c).
Groundnut Oil Also known as peanut oil, ground nut is one of the best oils to cook with. Nigel Slater is a fan because it has a high smoke point and lacks any strong flavours so won't overwhelm other ingredients. With around 45 per cent monounsaturated fatty acids, it's a better choice than corn or sunflower oil for cooking purposes,' Govindji says. Monounsaturated fatty acids are the heart-friendly fats also found in olive oil. Best for: frying and sautéing (smoke point is 230c).
Argan This deep yellow oil from Morocco has a nutrient-rich composition - it includes vitamin E and an omega-6 fatty acid called linoleic acid that has anti-inflammatory properties. Research has suggested that, consumed regularly, it helps to reduce cholesterol and triglycerides in the blood. Yotam Ottolenghi is a big fan and recommends its 'nutty and aromatic' flavour, adding that 'we love to drizzle it over chargrilled tomatoes, and it's a luxurious treat to dip bread into'. Best for: dips, salad dressings, flash-frying (smoke point is 220c).
Avocado Oil: Avocados are about 30 per cent oil which, when extracted from the fruit, is versatile with among the highest smoking points of all plant-based oils. The chef Lorraine Pascale uses it to fry with, as 'it is good for the heart and health, but it also has a very high smoke point'. It is rich in antioxidant vitamins and provides lutein, a naturally occurring carotenoid substance that boosts eye health. Best for: grilling, pan-frying (smoke point is 277c).
Coconut Oil: You buy this solid because, like butter, it's a saturated fat. It comes in different forms: processed and unrefined. Although overprocessing can destroy some of the beneficial essential fatty acids and antioxidants (such as lauric acid, a medium-chain fatty acid believed to raise good cholesterol levsls), coconut oil is still packed with goodness. Joe Wicks, the fitness guru, is a fan. 'The type of saturated fats in coconut oil may be used by the body more quickly than other types,' Govindji says. 'So coconut oil seems to be less of a health issues than some other saturated fat sources'. In the research at De Montford University, coconut oil was shown to produce the lowest levels of aldehydes when heated in frying tests alongside other oils. Meanwhile, the more expensive unrefined varieties should be kept for 'raw' cooking or spreading on toast. Best for: shallow and deep frying, roasting and baking if refined (smoke point is 204c). If unrefined, best for spreading (smoke point is low at 177c).
Grapeseed Oil: extracted from the seeds of grapes, this pale golden oil has a moderate smoke point, so it is good for quick, light frying. it has a high vitamin E content, but is generally highly processed. Like argan oil, it is high in omega-6 fatty acids (of which there are too many in the typical western diet) but it has almost none of the more beneficial omega-3s. Best for: flash frying (smoke point is moderate at 195-216c).
Flaxseed Oil: is a great source of healthy omega-3s. Gwyneth Paltrow is a fan. It can also reduce blood pressure. In a 12-week study of 59 middle-aged men, Greek researchers reporting in the Nature journal in 2007 found that flaxseed oil consumption was effective in reducing blood pressure. Other research suggests that it might also help to slow cancerous cell production - a 2008 study of prostate cancer patients showed that flaxseed oil consumption significantly reduced cancer cell creation rates. It has a low smoke point, so should be avoided for cooking. Best for: dips, salad dressings, drizzling over food after cooking (smoke point is low at 107c).
Rice Bran Oil: is extracted from the hard outer brown layer of rice after the chaff has been removed. It has a high smoke point so it is good to cook with, although it is rich in polyunsaturated fats that are prone to degradation when exposed to heat, so it is better to use for stir-fries than for foods that are cooked more slowly. A 2010 study in the Journal of Indian Medicine found that it helped to reduce levels of low-density lipoprotein, the bad form of cholesterol, when consumed regularly. One 2001 study in the journal Prostaglandins, Leuotrienes and Essential Fatty Acids found that rice bran oil mixed with coconut oil reduced blood clots by up to 37 per cent in patients. Best for: flash frying and dressings (smoke point is high at 232c).
Walnut Oil: This nut oil is rich in omega-3 fatty acids, manganese, vitamin E and copper. it is also a good source of antioxidants, specifically ellagic acid, which as been shown to prevent cancer cells from replicating. A Yale University study in 2009 found that daily consumption of walnuts improved the health of blood vessels, helping to reduce the risk of heart disease, and evidence suggests that the oil has similar benefits. Best for: flash frying and drizzling when refined (smoke point is 204-214c); unrefined is best for drizzling and dressings (smoke point is low at 160c).
In last week's blog I posted a picture of the muscles used in Bow Pose. We also practiced Bow Pose, Sanskrit name Dhanurasana, in my classes last week and this week's online class on Thrive Yoga features some different variations of this pose too. This article from Yoga Journal has some good alignment tips on how to do the pose correctly...
Stop Slouching! Improve Your Posture with Bow Pose
By Carol Krucoff via Yoga Journal
Indian mythology is rich with references to the bow (dhanu in Sanskrit), a simple stringed weapon that enables a steady and skilled archer to defeat an enemy. The pose Dhanurasana extends the body back into the shape of a bow as the arms reach back straight and taut, forming the “string” of the asana. Done properly, Dhanurasana is a superb back strengthener that can help vanquish the postural enemy of rounded shoulders. Arching the body backward opens the chest and provides a powerful stretch for the front of the shoulders and the quadriceps—a wonderful antidote to all the time we spend “crunched” forward in daily life. Regular practice of this pose helps keep the spine flexible and counters the tendency to slump forward.
Like all other backbends, Dhanurasana is dynamic and energizing—stretching the front body increases the flow of blood to the digestive tract and enhances the efficiency of the stomach, liver, and intestines, while contracting the back body stimulates the kidneys and adrenals. But it can be so invigorating that if you suffer from insomnia, you should not practice it late in the day.
Mind the Back
Dhanurasana enhances the back-strengthening and chest-and-abdomen-stretching effects of the other prone (belly down) backbends—such as Bhujangasana (Cobra) and Salabhasana (Locust)—which are often used as preparatory poses. Although catching the feet or ankles integrates the posture, it can also compress the back. For this reason, it’s important to create space between the vertebrae and to stay as relaxed as possible while you’re in the pose. You can also modify Dhanurasana by reaching the arms back without catching the ankles or by using a strap. So start with the modified versions and stay with them as long as you need to. Don’t worry about catching the ankles if this puts pressure on your knees or lower back. Remember that the Yoga Sutra of Patanjali—the classic guide compiled around the second century BCE—states that a yoga asana should have two qualities: sthira and sukha, which are generally translated as “steadiness” and “ease.” If you don’t feel steady and at ease in this pose, or any other, back off to easier versions until you do. Challenge yourself but don’t strain. You do not have to catch your feet or ankles to gain great benefit.
Warm the Body
Since Dhanurasana provides an intense stretch of the shoulders, spine, and thighs, warm up these areas properly. Begin in Balasana (Child’s Pose) with arms extended forward, and bring awareness to the lower back, breathing into your back ribs and dropping your hips toward your heels. Release head, arms, and shoulders. On an inhalation, come onto all fours. Then, on an exhalation, stretch back to Adho Mukha Svanasana (Downward-Facing Dog Pose). Inhale back to all fours and exhale to Balasana, repeating this series of linked poses five or six times, synchronizing the movements with your breath. Then move into Anjaneyasana (Crescent Pose) to open up the front of your thighs. From Downward Dog, step your right foot forward between your hands, with the toes in line with your fingertips. Bring your hands to your hips and drop your pelvis down so that your front knee bends forward, tracking directly over your toes. Add a shoulder stretch by clasping your hands behind your back—keep a “micro-bend” in the elbows—and bring your clasped hands up away from your tailbone. Then bring your hands back to the floor on either side of your foot, and step into Downward Dog. Repeat the lunge on the other side.
Look, Ma, No Hands
Before trying to “string” Bow Pose with your arms, practice a preparatory version that doesn’t require catching the ankles. Lie face-down with your legs hip-width apart and your arms by your sides, palms down. Bend your knees so that your shins are perpendicular to the floor, then lift the soles of your feet skyward. Exhale completely. On an inhalation, lift your head, shoulders, and upper back as high as you comfortably can as you keep your neck long by extending through the crown of your head. Stay there, and as you exhale, move your feet up toward the sky. Don’t worry if your thighs don’t lift very far off the floor; just do the best you can. Stay here for two or three breaths, continuing to lift your upper body and feet. Keep length in your lower back by sending breath into the back waist. Then release and relax.
One Bow at a Time
Some people can clasp one ankle but not both—either from tightness in the quadriceps or shoulders or from a knee problem. The Half Bow variation offers the experience of the complete, integrated pose on one side. Once you’re comfortable creating the basic shape of the pose with no hands, try Half Bow.
To come into Half Bow, lie on your belly with both of your arms extended forward. Bend your right knee, reach your right arm back, and take hold of your right ankle. Flex your right foot and, on an inhalation, move your right heel away from your buttock, using this action to help you lift your head and right shoulder off the floor and bow your body back as much as is comfortably possible. As you hold one ankle, extend the other leg and arm, pressing them into the floor to help stabilize the pose. Hold for three breaths on each side. If you need extra cushioning under your hips, lay a folded blanket over your yoga mat.
Grab a Strap
Another helpful modification for Bow Pose is to use a strap. Place the strap on one end of your mat where your shins will rest and curve it into a U shape. Lie face-down on the mat, making sure that the strap is positioned under your shins, and take one end of the strap in each hand. Keeping the legs hip-width apart, bend your knees and flex your feet, moving the strap so that it rests on your ankles. Walk your hands down the strap so they are as close to your feet as possible. Now, bring your heels toward your buttocks as you draw your abdominals in. Take a few breaths, extending your tailbone toward your knees and broadening the back of your pelvis. On an inhalation, “string the bow” by moving your shins away from your buttocks, letting this action draw your shoulders back and lift your head and chest off the floor. Focus on lifting your ribs and thighs off the floor, and ground yourself on your pubic bones and hip points. Flex your feet and lift the soles toward the ceiling so that your knees and as much of your thighs as possible are off the floor. Keep your neck long by extending the crown of the head toward the sky. Take your gaze upward, but don’t drop your head back—keep the neck long. If this bothers your neck, gaze forward, not up.
Bow Balance
After you’ve mastered practicing with a strap, you can safely try the full pose. At first, practice inhaling your body into a full bow and then exhaling it back down. When you are ready, inhale into the pose and stay there for two to five breaths, continuing to lift your chest and feet skyward while staying rooted on your pubic bones and hip bones. Press the shins back into the hands to help lift the chest. As much as possible, keep length in your lower back by sending breath into your back waist and broadening the back of the pelvis. Feel the back of your rib cage widen as you inhale. When you can no longer feel the sensation of lengthening your spine with your breath, come out of the pose by releasing your ankles and relaxing down to the floor. Press back into Child’s Pose to stretch out your back.
In the classic full pose, the legs are together, but this can be hard on the lower back, so let your legs open to a comfortable distance. Don’t let them splay apart, however, because this can also compress the lower back. Instead, try to keep the legs parallel. Whichever version you’re doing, remember to balance the effort needed to keep your bow taut, with the relaxation necessary to avoid compressing the back. Set your sights on maintaining steadiness and ease as you do your best to achieve your version of the pose. Don’t worry about looking picture perfect. Instead, aim your Bow Pose toward feeling exhilarated and joyous.
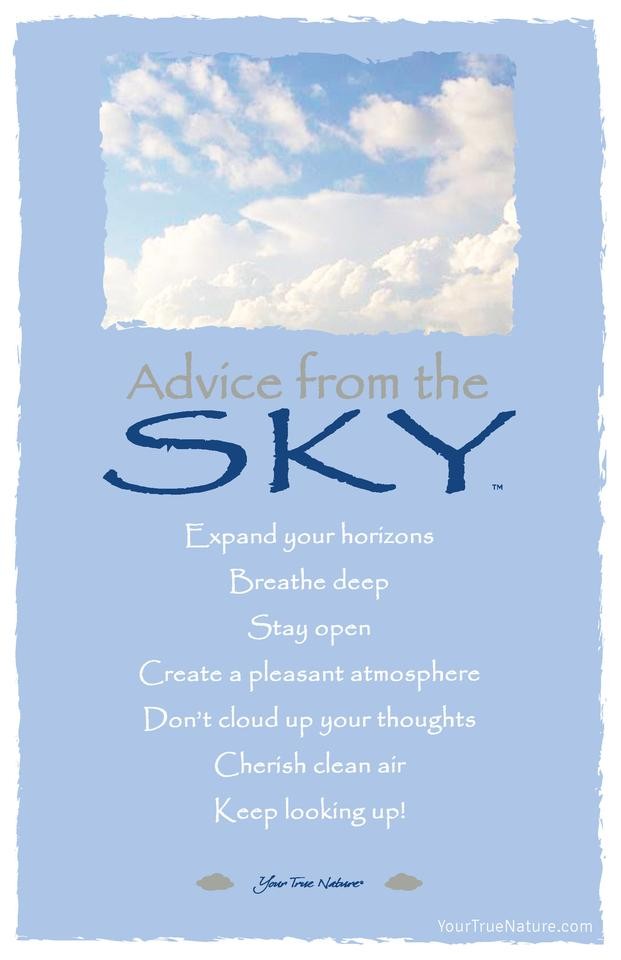
This Week's Advice From... the Sky
This Week's Musical Offering...
Is a relaxing track for a slow stretching sequence and/or Savasana or meditation. It's called Out of the Mist for Deep Meditation from an album called Soundscapes - music for deep meditation.
This Week's Video... is an anatomical look at Bow Pose - short and informative, it can really help you understand how the body is working in this posture.
And finally, my friend in Australia just posted on Facebook that her husband has won a major photography competition. This is his fabulous winning photo of a horse and a rainbow. The prize is a trip for the two to India... synchronicity.... photo credit Chris Cousins